
REMOVAL & INSTALLATION
See Figures 1 and 2
- Remove the luggage compartment trim to access the hinge bolts.
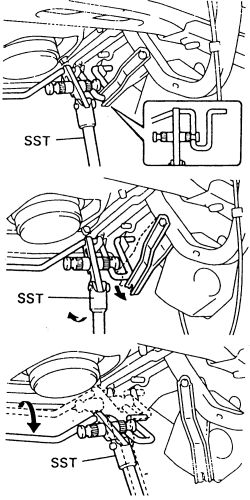
- Remove the torsion bars from the center bracket. Using tool SST 09804-24010 or its equivalent, push down on the torsion bar at one end and pull the luggage compartment lid hinge from the torsion bar.
 |  |
Fig. Fig. 1: A special tool is available to remove the torsion bars
| |
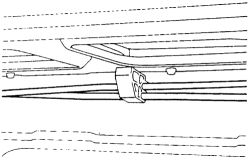
Fig. Fig. 2: Some torsion bars have brackets retaining them in the center
- Slowly lift the tool and remove the torsion bar from the bracket.
- Repeat steps 2 and 3 on the other side of the trunk lid to remove that torsion bar.
- Prop the hood in the upright position and scribe the hinge locations in the trunk.
- Remove the hinge-to-trunk lid mounting bolts and remove the trunk lid from the vehicle.
- Position the trunk lid on the vehicle and loosely install the retainer bolts.
- Align the scribe marks on the tailgate and secure the fasteners.
- Install the torsion bar to the side and center brackets, and using tool SST 09804-24010 or its equivalent, install the torsion bar to the hinges.
- Install the luggage compartment trim that was removed to access the hinge bolts.
ALIGNMENT
See Figures 3 and 4
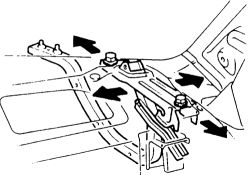
To adjust the trunk lid in forward/rearward and left/right directions:
- Remove the rear seat cushion and seat back.
| |
Fig. Fig. 3: Forward/rearward and left/right adjustment directions
- Remove the roof side inner garnish.
- Remove the rear seat side garnish and package tray trim.
- Loosen the hinge bolts and position the trunk lid as required. Tighten the hinge bolts to 48 inch lbs. (5 Nm).
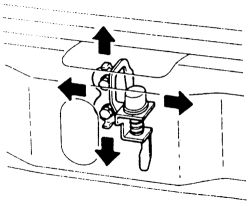
To adjust the trunk lid lock striker:
| |
Fig. Fig. 4: Lock striker adjustment directions
- Remove the rear floor finish plate by pulling.
- Remove the clips and the rear luggage trim.
- Loosen the bolts and adjust. Install the necessary trim panels.