
See Figure 1
All of the dirt and dust present in the air is kept out of the engine by means of the air cleaner filter element. Proper maintenance is vital, as a clogged element not only restricts the air flow and thus the power, but can also cause premature engine wear.
 |  |
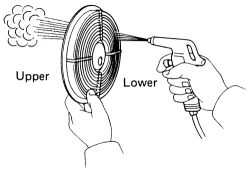
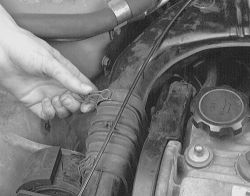
Fig. Fig. 1: Clean the filter element using compressed air
The filter element should be cleaned/inspected every 6 months or 7,500-10,000 miles or more often if the car is driven under dry, dusty conditions. Remove the filter element and using low pressure compressed air, blow the dirt out.
The filter element used on Toyota vehicles is of the dry, disposable type. It should never be washed, soaked or oiled.
The filter element must be replaced at 36 months or 30,000 mile intervals or more often under dry, dusty conditions. Be sure to use the correct air filter element for your engine.
REMOVAL & INSTALLATION
See Figures 2, 3, 4, 5, 6, 7 and 8
The air filter element should be replaced at the recommended intervals shown in the Maintenance Intervals chart later in this section. If your car is operated under severely dusty conditions or severe operating conditions, more frequent changes will certainly be necessary. Inspect the element at least twice a year. Early spring and early fall are always good times for inspection. Remove the element and check for any perforations or tears in the filter. Check the cleaner housing for signs of dirt or dust that may have leaked through the filter element or in through the snorkel tube. Shine a bright light on one side of the element and look through the filter at the light. If no glow of light can be seen through the element material, replace the filter. If holes in the filter element are apparent or signs of dirt seepage through the filter are evident, replace the filter.

| |
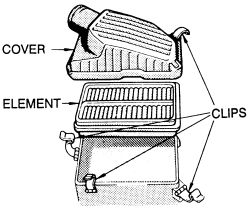
Fig. Fig. 2: Exploded view of the air cleaner-carbureted engines
- Disconnect all hoses, ducts and vacuum tubes which would block removal of the top of the air cleaner assembly.
| |
Fig. Fig. 3: There are clips on either side of the air cleaner lid to retain the assembly together-4A-FE engine shown
| |
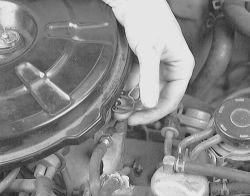
Fig. Fig. 4: Unclasp the air cleaner lid from the housing on carbureted models
| |
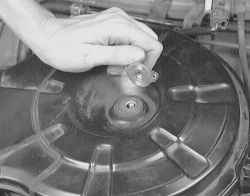
Fig. Fig. 5: Remove the wingnut from the top of the cleaner assembly
- For round air cleaner housings, remove the top cover wing nut and grommet, if present. Most models will also use three or four side clips to further secure the top of the assembly. Pull the wire tab and release the clip. Remove the cover and lift out the filter element.
| |
Fig. Fig. 6: Separate the air cleaner hose from the snorkle
- On fuel injected engines, simply release the clips holding the top of the air box and lift the lid. Note that some of these clips may be in close quarters against bodywork or other components; don't pry or force the clips.
| |
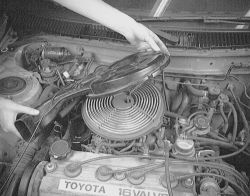
Fig. Fig. 7: Lift the air cleaner lid, then ...
| |
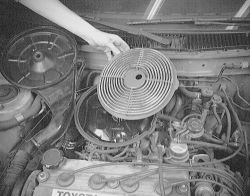
Fig. Fig. 8: ... remove the air filter from the housing
- Remove the filter element. Clean or replace as needed. Wipe clean all surfaces of the air cleaner housing and cover. Check the condition of the mounting gasket and replace it if it appears worn or broken.
- Reposition the filter element in the case and install the cover, being careful not to overtighten the wingnut(s). On round-style cleaners (carbureted engines), be certain that the arrows on the cover lid and the snorkel match up properly. The lid of the air cleaner housing must be correctly installed and fit snugly. Air leaks around the top can cause air to bypass the filter and allow dirt into the engine.
Filter elements on fuel injected engines have a TOP and BOTTOM side, be sure they are inserted correctly.
- Connect all hoses, duct work and vacuum lines.
Never operate the engine without the air filter element in place.