
SERVICING
See Figure 1
Check the evaporation control system every 15,000 miles (24,000 km). Check the fuel and vapor lines and the vacuum hoses for proper connections and correct routing, as well as condition. Replace clogged, damaged or deteriorated parts as necessary.
If the charcoal canister is clogged, it may be cleaned using low pressure (no more than 43 psi) compressed air. The entire canister should be replaced every 60,000 miles (96,540 km). The charcoal canister is located usually on the right or left front of the engine compartment.
 |  |
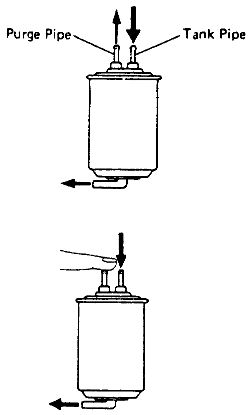
Fig. Fig. 1: When applying the air, hold a finger over the purge pipe to force all the air out the bottom port
See Figures 2 through 9
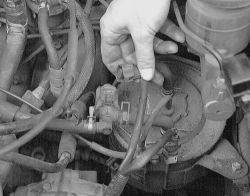
- Label the vacuum lines leading to the canister.
- Remove the vacuum lines attached to the canister.
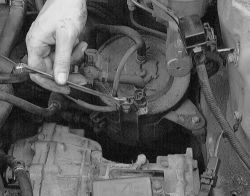
- Unfasten the retaining bolts from the canister.
- Lift the canister up and remove the lower hose attached to the unit.
- Inspect the case for any cracking or damage.
| |
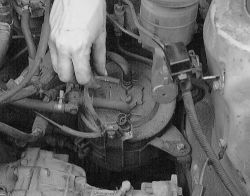
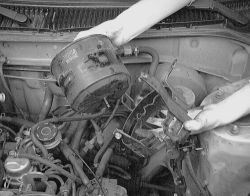
Fig. Fig. 2: When removing the charcoal canister, disconnect any harnesses in the way
| |
Fig. Fig. 3: A solinoid may need to be removed to access the cansiter
| |
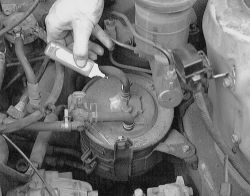
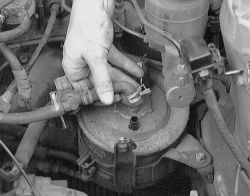
Fig. Fig. 4: Always label the hoses prevent mixing them up duiring installation
| |
Fig. Fig. 5: Remove the small hose first ...
| |
Fig. Fig. 6: ... then pull off the two hoses from the top of the canister
| |
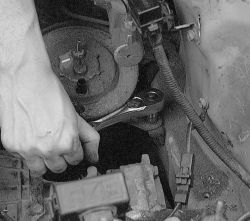
Fig. Fig. 7: Remove the mounting bolts retaining the canister to the frame rail
| |
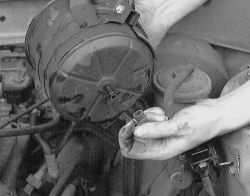
Fig. Fig. 8: Lift the unit form the engine and remove the lower hose from the canister
| |
Fig. Fig. 9: Next, pull the canister from its mounting bracket
- Using low pressure compressed air, blow into the tank pipe (flanged end) and check that air flows freely from the other ports.
- Blow into the purge pipe (next to tank pipe) and check that air does not flow from the other ports. If air does flow, the check valve has failed and the canister must be replaced.
- Never attempt to flush the canister with fluid or solvent. Low pressure air 43 psi (294 kPa) maximum may be used to evaporate any vapors within the canister. When applying the air, hold a finger over the purge pipe to force all the air out the bottom port.
- No carbon should come out of the filter at any time. Loose charcoal is a sign of internal failure in the canister.