
Safety glasses should be worn at all times when working on or near the exhaust system. Older exhaust systems will almost always be covered with loose rust particles which will shower you when disturbed. These particles are more than a nuisance and could injure your eye.
See Figures 1 through 7
 |  |
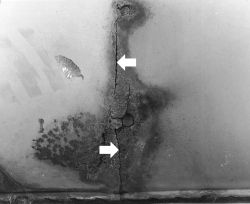
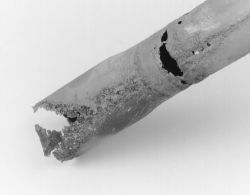
Fig. Fig. 1: Cracks in the muffler are a guaranteed leak
| |
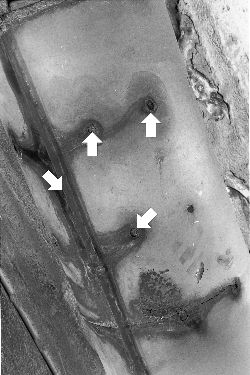
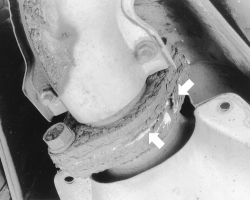
Fig. Fig. 2: Check the muffler for rotted spot welds and seams
Your vehicle must be raised and supported safely to inspect the exhaust system properly. By placing 4 safety stands under the vehicle for support should provide enough room for you to slide under the vehicle and inspect the system completely. Start the inspection at the exhaust manifold or turbocharger pipe where the header pipe is attached and work your way to the back of the vehicle. On dual exhaust systems, remember to inspect both sides of the vehicle. Check the complete exhaust system for open seams, holes loose connections, or other deterioration which could permit exhaust fumes to seep into the passenger compartment. Inspect all mounting brackets and hangers for deterioration, some models may have rubber O-rings that can be overstretched and non-supportive. These components will need to be replaced if found. It has always been a practice to use a pointed tool to poke up into the exhaust system where the deterioration spots are to see whether or not they crumble. Some models may have heat shield covering certain parts of the exhaust system , it will be necessary to remove these shields to have the exhaust visible for inspection also.
| |
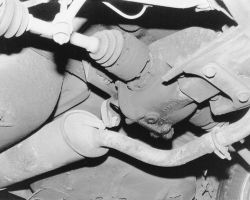
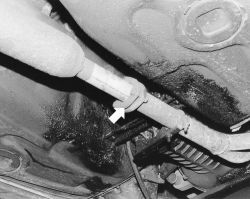
Fig. Fig. 3: Make sure the exhaust components are not contacting the body or suspension
| |
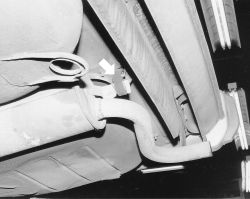
Fig. Fig. 4: Check for overstreached or torn exhaust hangers
| |
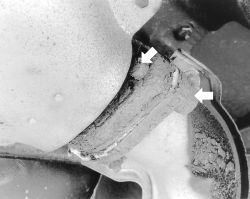
Fig. Fig. 5: Example of a badly deteriorated exhaust pipe
| |
Fig. Fig. 6: Inspect flanges for gaskets that have deteriorated and need replacement
| |
Fig. Fig. 7: Some systems, like this one, use large O-rings (donuts) in between the flanges
REPLACEMENT
See Figures 8 and 9
There are basically two types of exhaust systems. One is the flange type where the component ends are attached with bolts and a gasket in-between. The other exhaust system is the slip joint type. These components slip into one another using clamps to retain them together.

| |
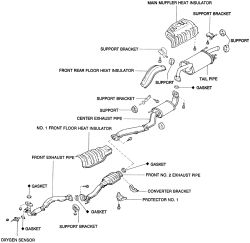
Fig. Fig. 8: Exhaust system components-2WD 4A-FE engine
| |
Fig. Fig. 9: Exhaust system components-4WD 4A-FE engine
See Figures 10 through 14
| |
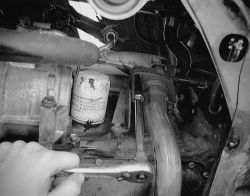
Fig. Fig. 10: On the front pipe at the manifold, loosen and remove the bolts
| |
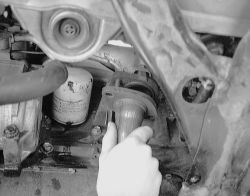
Fig. Fig. 11: Separate the front pipe from the exhaust manifold
Before removing any component of the exhaust system, ALWAYS squirt a liquid rust dissolving agent onto the fasteners for ease of removal. A lot of knuckle skin will be saved by following this rule. It may even be wise to spray the fasteners and allow them to sit overnight.
| |
Fig. Fig. 12: Nuts and bolts will be extremely difficult to remove when deteriorated with rust
| |
Fig. Fig. 13: Example of a flange type exhaust system joint
Before removing any component on a flange type system, ALWAYS squirt a liquid rust dissolving agent onto the fasteners for ease of removal. Start by unbolting the exhaust piece at both ends (if required). When unbolting the headpipe from the manifold, make sure that the bolts are free before trying to remove them. if you snap a stud in the exhaust manifold, the stud will have to be removed with a bolt extractor, which often means removal of the manifold itself. Next, disconnect the component from the mounting; slight twisting and turning may be required to remove the component completely from the vehicle. You may need to tap on the component with a rubber mallet to loosen the component. If all else fails, use a hacksaw to separate the parts. An oxy-acetylene cutting torch may be faster but the sparks are DANGEROUS near the fuel tank, and at the very least, accidents could happen, resulting in damage to the under-car parts, not to mention yourself.
Slip Joint Type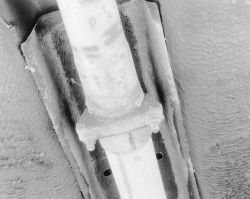
| |
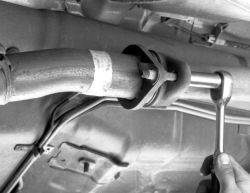
Fig. Fig. 14: Example of a common slip joint type system
Before removing any component on the slip joint type exhaust system, ALWAYS squirt a liquid rust dissolving agent onto the fasteners for ease of removal. Start by unbolting the exhaust piece at both ends (if required). When unbolting the headpipe from the manifold, make sure that the bolts are free before trying to remove them. if you snap a stud in the exhaust manifold, the stud will have to be removed with a bolt extractor, which often means removal of the manifold itself. Next, remove the mounting U-bolts from around the exhaust pipe you are extracting from the vehicle. Don't be surprised if the U-bolts break while removing the nuts. Loosen the exhaust pipe from any mounting brackets retaining it to the floor pan and separate the components.