
REMOVAL & INSTALLATION
See Figures 1, 2 and 3
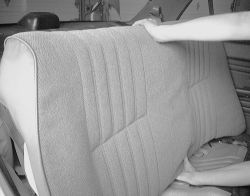
- Remove the seat back side cushion or the rear sill side panel to gain access to the upper strut mount.
 |  |
Fig. Fig. 1: Remove the rear seat back to access the upper strut mounting
- Raise the rear of the vehicle and support it with jackstands (do not place stands under suspension arms). Remove the wheel.
| |
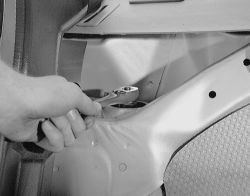
Fig. Fig. 2: Remove the upper strut nut from the tower in the trunk
| |
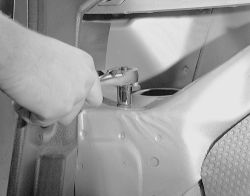
Fig. Fig. 3: Next remove the three upper strut mounting nuts on the outer portion of the tower
- Disconnect the brake hose from the shock absorber. Disconnect the ABS wire harnesses if so equipped.
- Disconnect the stabilizer bar link from the strut assembly as necessary. Remove the 2 lower bolts holding the strut to the axle carriage.
- Remove the 3 upper strut mounting nuts and carefully remove the strut assembly.
Check the shock absorber by moving the piston shaft through its full range of travel. It should move smoothly and evenly throughout its entire travel without any trace of binding or notching. Use a small straightedge to check the piston shaft for any bending or deformation. If a shock absorber is replaced, the old one should be drilled at the center to vent the internal gas. Wear safety goggles and drill a small hole (2-3mm) into the center of the shock absorber. The gas within the strut is colorless, odorless and non-toxic, but should be vented to make the unit safe for disposal.
To install:- Use a floor jack to gently raise the suspension and guide the upper strut mount into position.
- Tighten the lower strut retaining nuts and bolts to 105 ft. lbs. (142 Nm).
- Tighten the 3 upper retaining bolts to 29 ft. lbs. (39 Nm).
- Attach the stabilizer bar link to the strut assembly and tighten the nut to 33 ft. lbs. (44 Nm).
- Reconnect the brake hose to the shock absorber. Connect the ABS wire harnesses if so equipped.
- Install the wheel. Lower the vehicle to the ground.
- Reinstall the interior components as necessary.