
REMOVAL & INSTALLATION Tie Rod Ends
- Raise the front of the vehicle and support it safely. Remove the wheel.
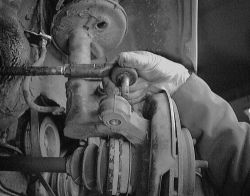
- Matchmark the inner end of the tie rod to the end of the steering rack.
See Figures 1 through 6
 |  |
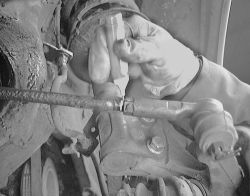
Fig. Fig. 1: Always matchmark the tie rod end for installation purposes
- Remove the cotter pin and nut holding the tie rod to the steering knuckle.
| |
Fig. Fig. 2: Remove and discard the cotter pin, NEVER reuse the old one
| |
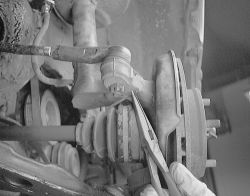
Fig. Fig. 3: Remove the tie rod end retaining nut
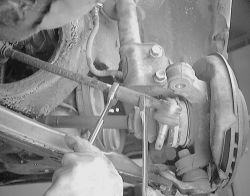
- Using a tie rod separator, press the tie rod out of the knuckle.
| |
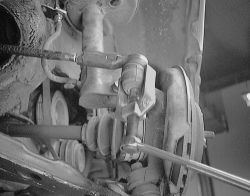
Fig. Fig. 4: Using a separating tool, press the tie rod from the knuckle
Use only the correct tool to separate the tie rod joint. Replace the joint if the rubber boot is cracked or ripped.
| |
Fig. Fig. 5: Pull the tie rod out of the knuckle using your hands
- Loosen the locknut and remove the tie rod (count the number turns out to remove the tie rod) from the steering rack.
| |
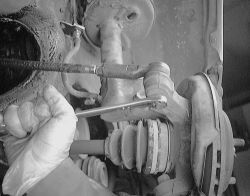
Fig. Fig. 6: Unscrew the end from the steering rack
- Install the tie rod end (count the same amount of turns in for correct installation) onto the rack ends and align the matchmarks made earlier.
- Tighten the locknut to 41 ft. lbs. (55 Nm).
- Connect the tie rod to the knuckle. Tighten the tie rod to steering knuckle nut to 36 ft. lbs. (49 Nm) and install a NEW cotter pin. Wrap the prongs of the cotter pin firmly around the flats of the nut.
- Install the wheel and lower the vehicle to the ground. Have the alignment checked at a reputable repair facility. The toe adjustment may have to be reset.