
REMOVAL & INSTALLATION
CAUTION
Brake pads may contain asbestos, which has been determined to be a cancer causing agent. Never clean the brake surfaces with compressed air! Avoid inhaling any dust from any brake surfaces. When cleaning brake surfaces, use a commercially available brake cleaning fluid.
See Figure 1
 |  |
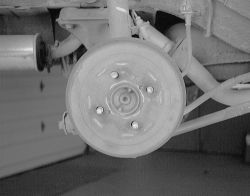
Fig. Fig. 1: The brake drum can be accessed after removing the wheel
- Loosen the rear wheel lug nuts slightly. Release the parking brake.
- Block the front wheels, raise the rear of the vehicle, and safely support it with jackstands.
- Remove the wheel lug nuts and the wheel.
- Tap the brake drum lightly with a rubber mallet to free the drum if resistance is felt. Sometimes brake drums are stubborn. If the drum is difficult to remove, perform the following: Insert the end of a bent wire (a coat hanger will do nicely) through the hole in the brake drum and hold the automatic adjusting lever away from the adjuster. Reduce the brake shoe adjustment by turning the adjuster bolt with a brake tool. The drum should now be loose enough to remove without much effort.
- Clean the drum and inspect it as detailed in this section.
- If the adjuster was loosened to remove the brake drum, turn the adjuster bolt to adjust the length to the shortest possible amount.
- Hold the brake drum so that the hole on the drum is aligned with the large hole on the axle carrier and install the drum.
- Pull the parking lever all the way up until a clicking sound can no longer be heard. Check the clearance between brake shoes and brake drum if necessary.
- Install the rear wheels, tighten the wheel lug nuts and lower the vehicle.
- Retighten the wheel lug nuts and pump the brake pedal a few times before moving the vehicle.
INSPECTION
- Remove the inspection hole plug from the backing plate, and with the aide of a flashlight, check the lining thickness. The minimum brake lining thickness is 0.039 inch (1.0mm). If the brake lining does not meet the minimum specification, replace the brake shoes as a set.
- Remove the brake drum and clean it thoroughly.
- Inspect the drum for scoring, cracks, grooves and out-of-roundness. Replace or refinish the brake drum, as required. Light scoring may be removed by dressing the drum with fine grit emery cloth. Heavy scoring will require the use of a brake drum lathe to turn or refinish the brake drum.
- Using inside calipers or equivalent, measure the inside diameter of the brake drum. The standard inside diameter is 7.874 inch (200mm). The maximum inside diameter is 7.913 inch (201mm). If the brake drum exceeds the maximum diameter, replace it.