
REMOVAL & INSTALLATION
See Figures 1, 2 and 3
The wheel cylinder is located on the upper portion of the brake unit. The brake shoes attach on either side of it.
- Raise and safely support the vehicle.
- Remove the brake drums and brake shoes-refer to the necessary service procedures.
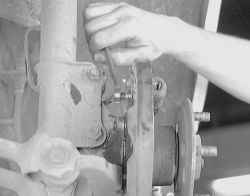
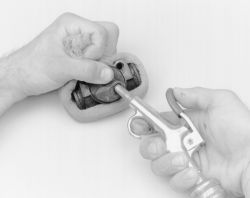
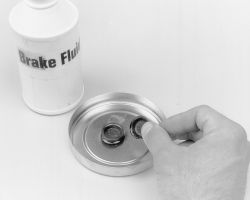
- Working from behind the backing plate, disconnect the hydraulic line from the wheel cylinder, use a line wrench or equivalent.
 |  |
Fig. Fig. 1: From behind the backing plate, unsecure the hydraulic line with a brake tool
| |
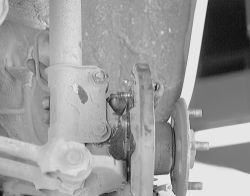
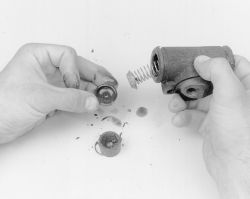
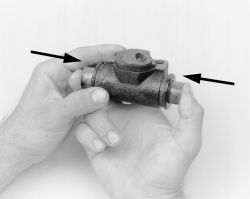
Fig. Fig. 2: Pull the line away from the back of the wheel cylinder
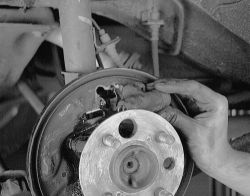
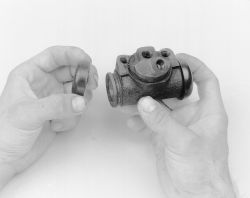
- Remove the bolts retaining the wheel cylinder and withdraw the cylinder.
| |
Fig. Fig. 3: Remove the wheel cylinder mounting bolts and withdraw it from the vehicle
- Attach the wheel cylinder to the backing plate. Torque the bolts to 7 ft. lbs.
- Connect the hydraulic line to the wheel cylinder and tighten it.
- Install the brake shoes and drums. Make all the necessary adjustments.
- Fill the master cylinder to the proper level with clean brake fluid bleed the brake system. Check the brake system for leaks.
OVERHAUL
See Figures 4 through 13
Wheel cylinder overhaul kits may be available, but often at little or no savings over a reconditioned wheel cylinder. It often makes sense with these components to substitute a new or reconditioned part instead of attempting an overhaul.
If no replacement is available, or you would prefer to overhaul your wheel cylinders, the following procedure may be used. When rebuilding and installing wheel cylinders, avoid getting any contaminants into the system. Always use clean, new, high quality brake fluid. If dirty or improper fluid has been used, it will be necessary to drain the entire system, flush the system with proper brake fluid, replace all rubber components, then refill and bleed the system.
- Remove the wheel cylinder from the vehicle and place on a clean workbench.
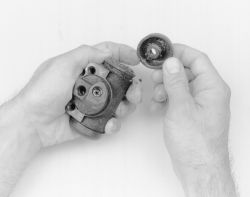
- First remove and discard the old rubber boots, then withdraw the pistons. Piston cylinders are equipped with seals and a spring assembly, all located behind the pistons in the cylinder bore.
| |
Fig. Fig. 4: Remove the outer boots from the wheel cylinder
- Remove the remaining inner components, seals and spring assembly. Compressed air may be useful in removing these components. If no compressed air is available, be VERY careful not to score the wheel cylinder bore when removing parts from it. Discard all components for which replacements were supplied in the rebuild kit.
| |
Fig. Fig. 5: Compressed air can be used to remove the pistons and seals
| |
Fig. Fig. 6: Remove the pistons, cup seals and spring from the cylinder
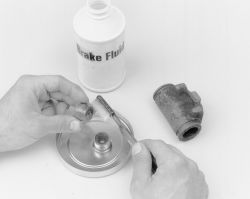
- Wash the cylinder and metal parts in denatured alcohol or clean brake fluid.
| |
Fig. Fig. 7: Use brake fluid and a soft brush to clean the pistons ...
| |
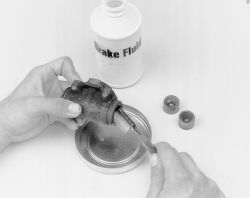
Fig. Fig. 8: ... and the bore of the wheel cylinder
- Allow the parts to air dry or use compressed air. Do not use rags for cleaning, since lint will remain in the cylinder bore.
- Inspect the piston and replace it if it shows scratches.

| |
Fig. Fig. 9: Once cleaned and inspected, the wheel cylinder is ready for assembly
- Lubricate the cylinder bore and seals using clean brake fluid.
- Position the spring assembly.
- Install the inner seals, then the pistons.
| |
Fig. Fig. 10: Lubricate the cup seals with brake fluid

| |
Fig. Fig. 11: Install the spring, then the cup seals in the bore
| |
Fig. Fig. 12: Lightly lubricate the pistons, then install them
- Insert the new boots into the counterbores by hand. Do not lubricate the boots.
| |
Fig. Fig. 13: The boots can now be installed over the wheel cylinder ends
- Install the wheel cylinder.