
REMOVAL & INSTALLATION
See Figures 1 through 6
 |  |
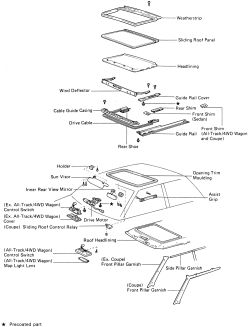
Fig. Fig. 1: Exploded view of the sunroof components
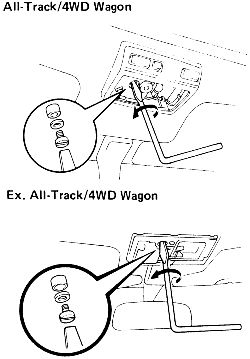
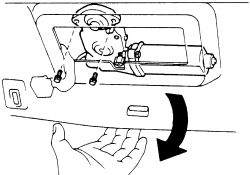
If there is ever an emergency, and the sunroof is stuck in the open position, do the following. On 4WD All-track wagons: remove the map light lens, on all models except 4WD All-tracks; remove the control switch cover. Then, remove the large screw inside. Manually operate the sun roof by inserting a special crank-shaped tool into the hole and turning the driveshaft.
| |
Fig. Fig. 2: The sunroof can be closed manually
Becareful not to loose the spring washer and shim.
- Disconnect the negative battery cable.
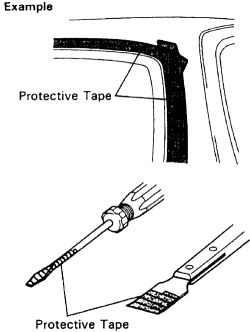
- Using a screwdriver (with a taped tip), remove the cover and the power roof switch. Separate the switch wiring from the harness.
| |
Fig. Fig. 3: Apply protective tape on the tip of the prying or removal tool
| |
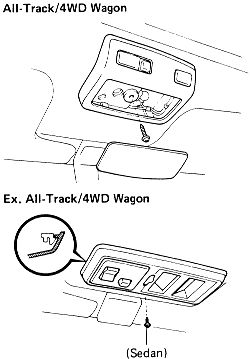
Fig. Fig. 4: Remove the sunroof switch assembly
- Remove the inner rear view mirror, sun visors and holders, assist grips and interior light.
- Remove the front pillar garnishes and the side garnishes. It may be necessary to remove the upper and the lower side garnishes to allow enough clearance for the removal of the headliner.
- On the four door models, remove the rear door scuff plates, seat cushion and seat back. Unclasp the headliner rear trim.
- Remove the front and rear seat belt shoulder outer anchors. Detach the center rear and upper garnishes. Pull the headliner off the vehicle. Make sure the trim is all removed prior to detachment of the headliner.
- Disconnect and remove the sliding roof control relay.
- Disconnect the electrical harness, remove the fasteners and the drive motor.
| |
Fig. Fig. 5: Unbolt and disconnect the wiring remove the motor
- Remove screws from the wind deflector and pull the unit from the vehicle.
- Remove the side guide rail trim cover.
- Apply tape to the vehicle to protect the finish and remove the screws holding the glass into the roof.
- Remove the sunroof from the vehicle lifting outward and slightly forward. Take notice of shim positioning (if so equipped) and install in original location on installation.
- Install the roof onto the vehicle from above. Take notice of shim positioning and install in original location.
| |
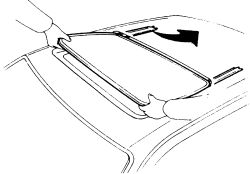
Fig. Fig. 6: Place the sliding roof with guide rail onto the roof
- Install the screws holding the glass into the roof.
- Install the side guide rail trim covers.
- Connect the electrical harness, then install the drive motor and fasteners.
- Position the sliding roof control relay and secure, attach the wiring.
- Install the wind deflector and secure on the vehicle with the retaining screws.
- Install the front side of the headliner and front pillar garnishes. Attach the upper and the lower side garnishes, if removed. Attach the seat belt shoulder anchors, tighten the mounting bolts to 32 ft. lbs. (43 Nm).
- Install the inner rear view mirror, sun visors and holders, assist grips and interior light.
- Install the roof switch and cover.
- Connect the negative battery cable. Check sliding roof for proper operation.
ADJUSTMENT
See Figures 7 and 8
- Adjust sliding roof level difference-by increasing or decreasing the number of shims between the bracket and sliding roof.
| |
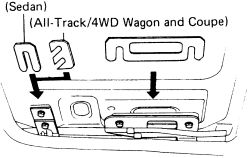
Fig. Fig. 7: Increase or decrease the amount of shims for level adjustment
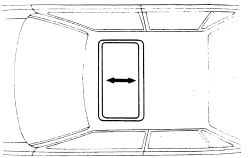
- Adjust sliding roof in forward/rearward and vertical directions-loosen the sliding roof installation bolts to adjust.
| |
Fig. Fig. 8: Forward/rearward and vertical sun roof adjustment